Deploy a Hugo website to Cloudflare
Last updated on September 8, 2024Cloudflare is one of the leading Content Delivery Network (CDN) providers on the Internet. In addition to its CDN services, Cloudflare offers a comprehensive suite of solutions, including cloud cybersecurity, DDoS mitigation, Wide Area Network (WAN) services, and Domain Name System (DNS) management.
Their free plan offers the following features:
- Unlimited bandwidth for static files with low latency.
- Unlimited DDoS protection.
- Universal SSL Certificate.
- Intuitive dashboard with detailed insights and analytics.
- 500 build minutes per month, with a maximum timeout of 20 minutes per build.
- Support for up to 100 custom domains.
- Projects can contain up to 20,000 files.
- A maximum file size of 25 MiB per asset for Cloudflare Pages sites.
Review the latest limits for Cloudflare Pages here.
First, we need to purchase or rent a domain name for our site. I highly recommend using Namecheap due to their affordable prices and excellent customer support (note: I have no affiliation with them).
Next, we will create a free account on Cloudflare.
Creating a website on Cloudflare
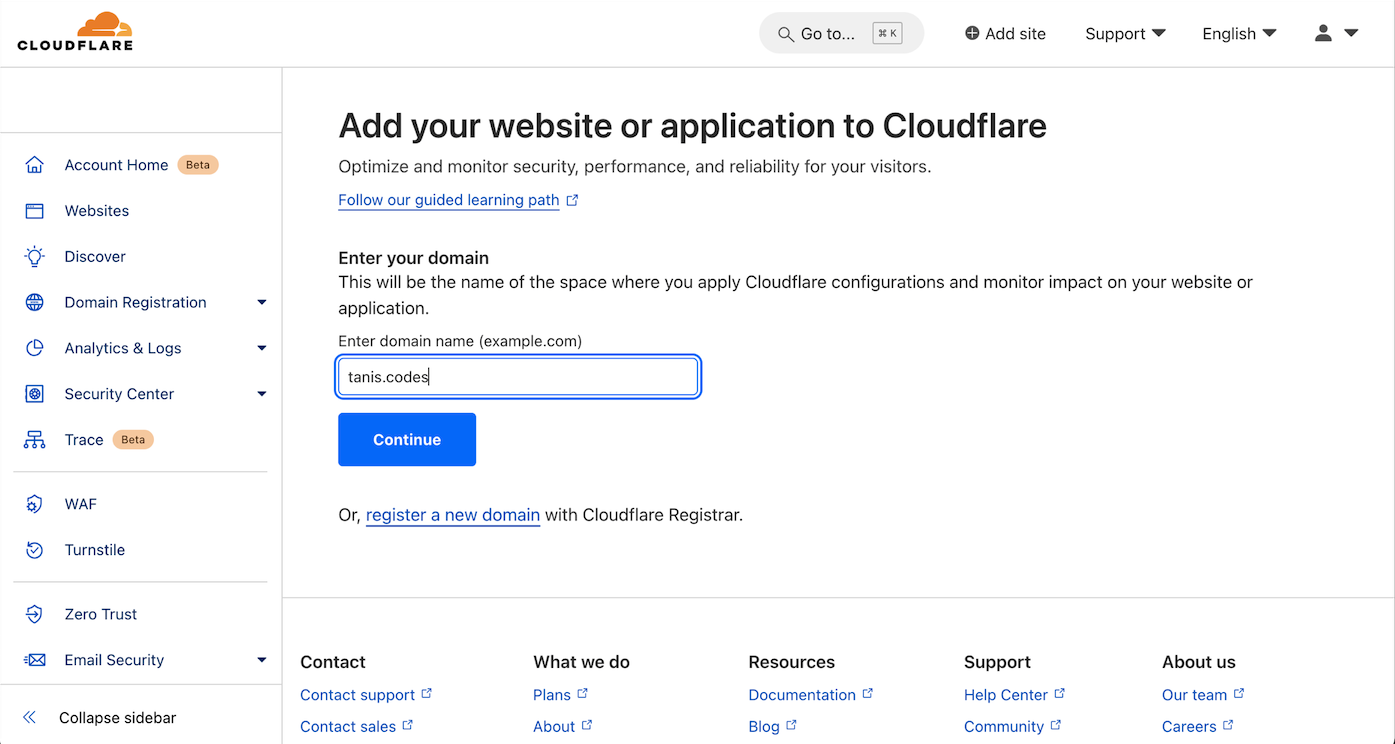
In the Websites section, click the + Add domain button. Enter your domain name, then click Continue.
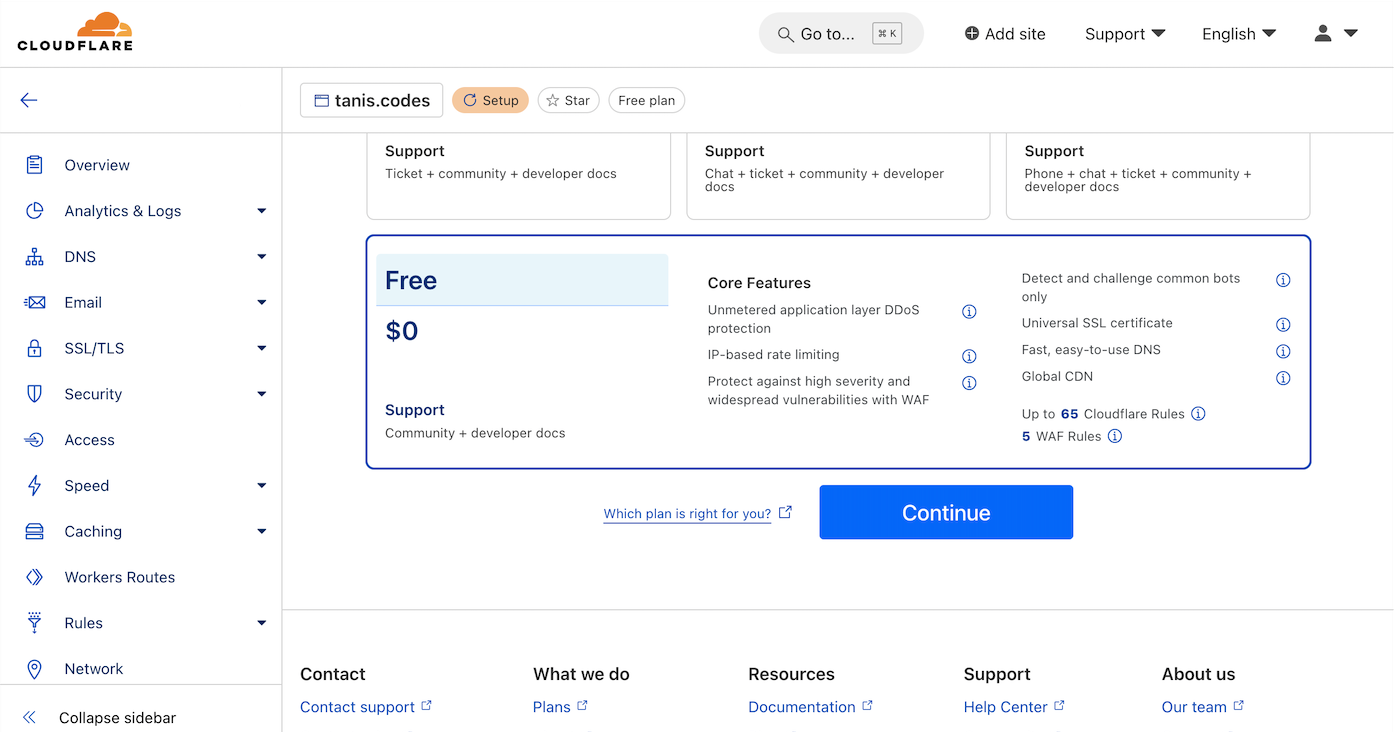
Next, select the free plan and click Continue.
Your website will now be in the Pending Nameserver Update state.
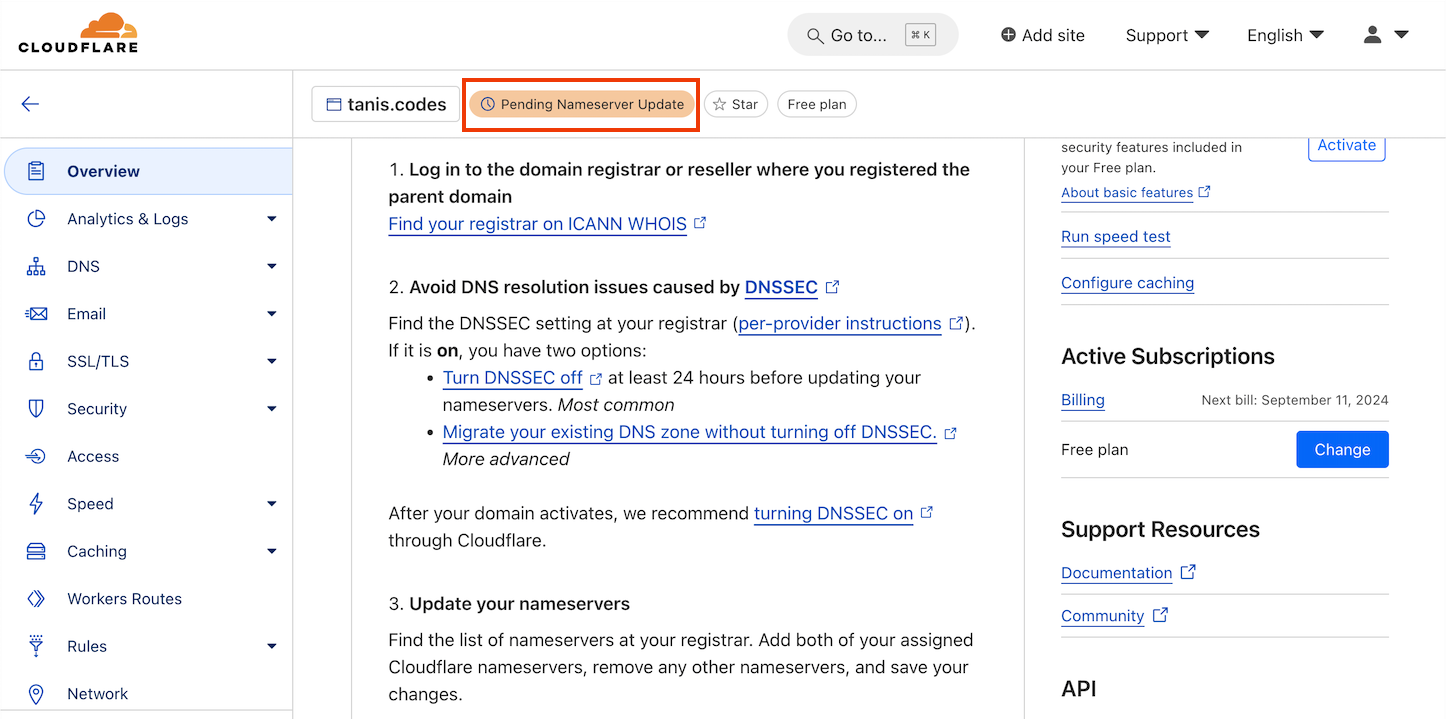
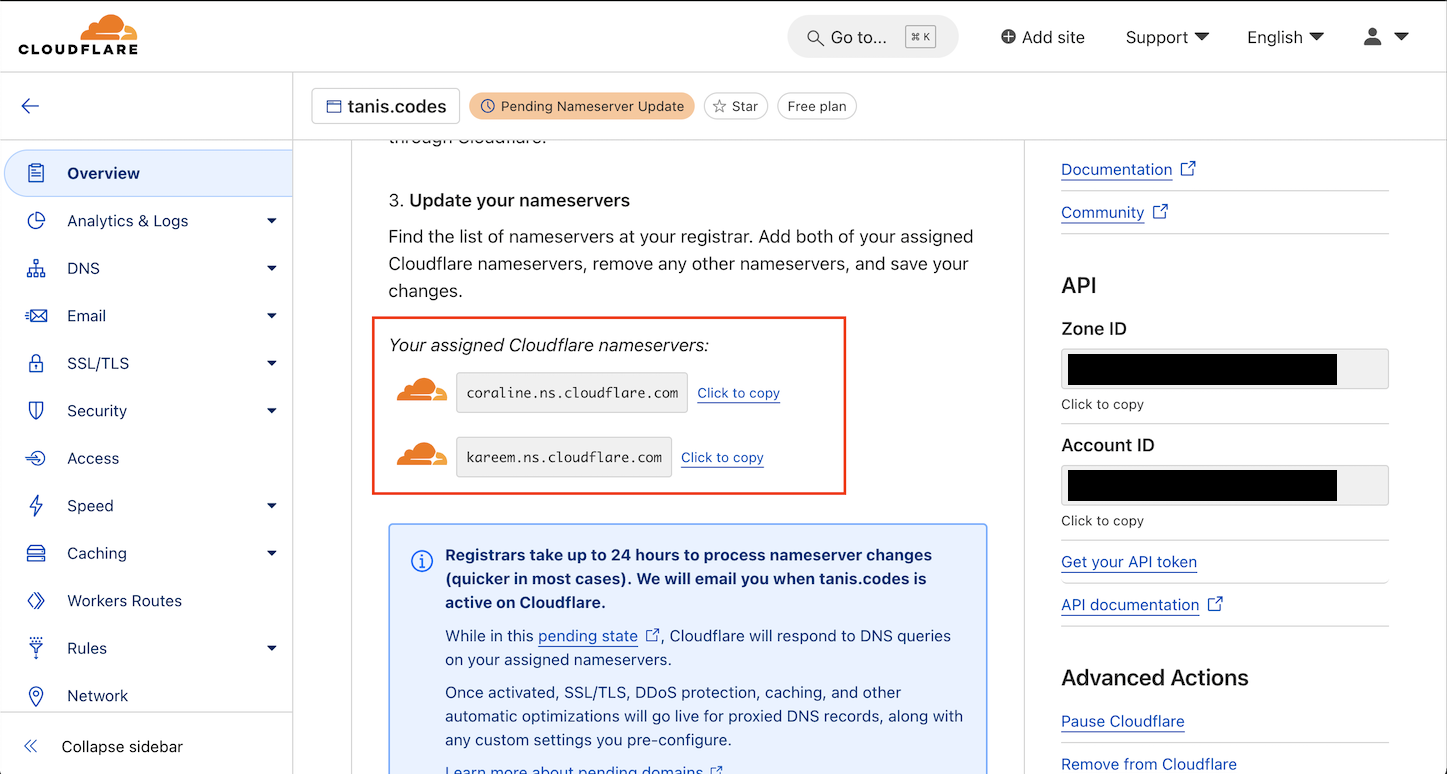
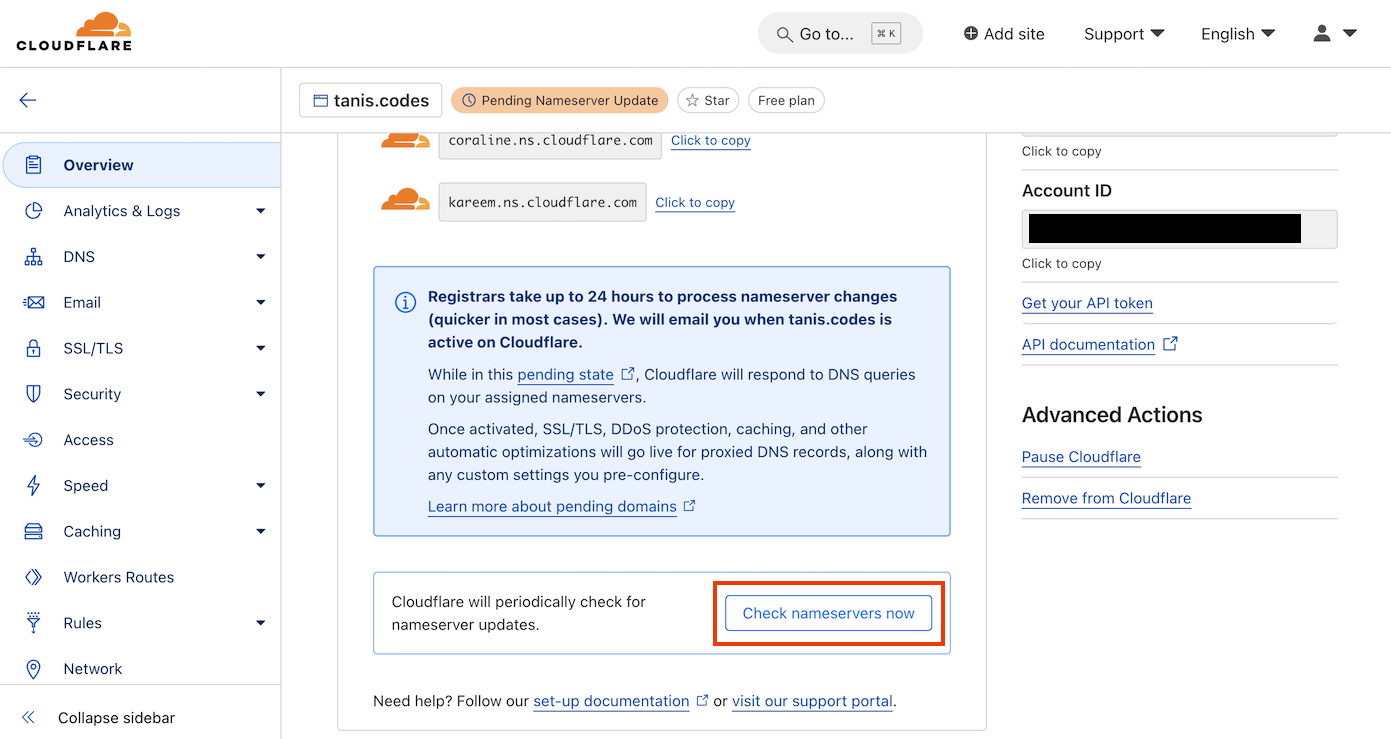
Cloudflare assigns unique nameservers to each website. In my case, the nameservers are coraline.ns.cloudflare.com and kareem.ns.cloudflare.com.
The next step is to configure these nameservers with your DNS provider, where you purchased or rented your domain name.
If you purchased your domain through a different DNS provider, refer to the instructions from both your provider and Cloudflare. In this guide, we’ll be following the steps for Namecheap.
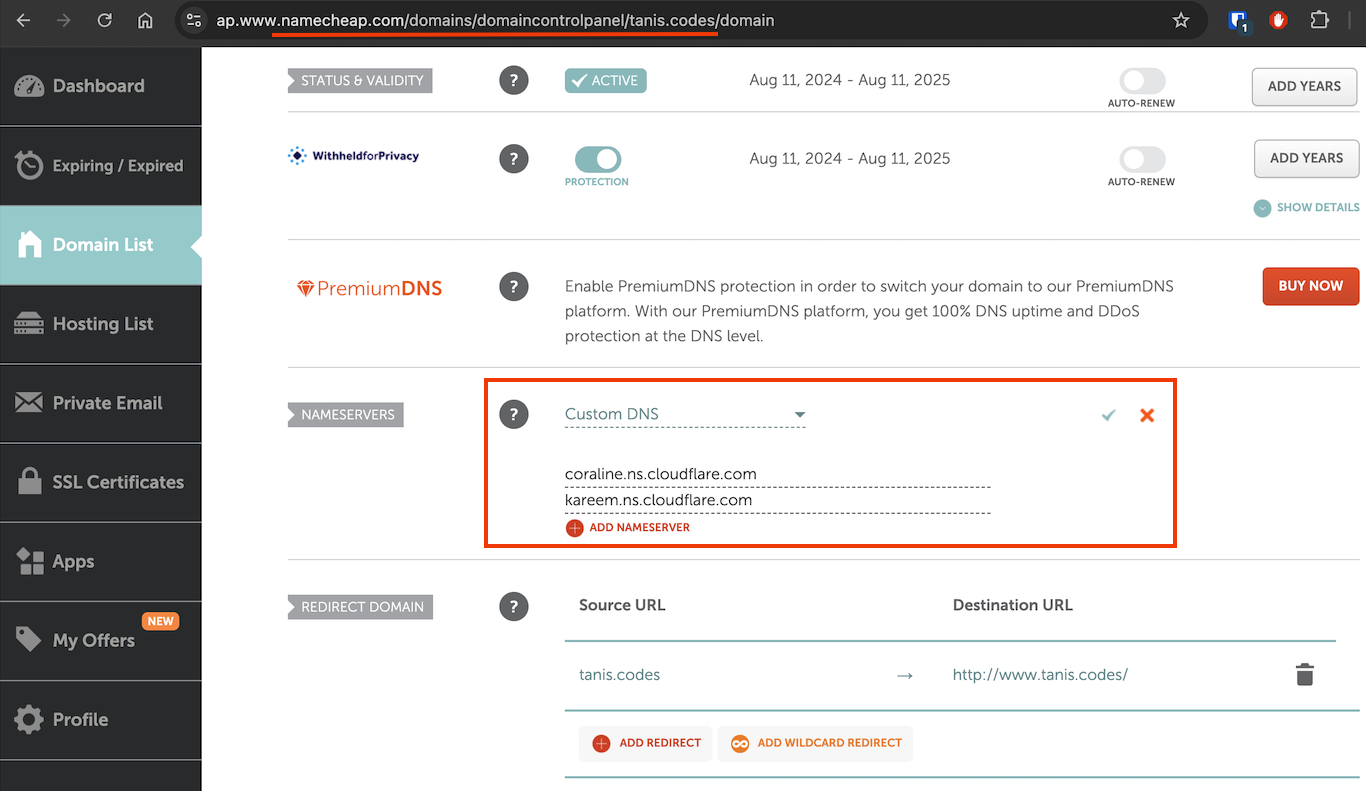
In the Domain List section, select your domain and navigate to Nameservers. Change the setting to Custom DNS, then enter the Cloudflare nameservers assigned to you.
Do not forget to click on the ✅ button to save the changes.
Cloudflare will periodically check for nameserver updates, but it may be forced by clicking Check nameservers now.
Once triggered, the following message will be displayed:
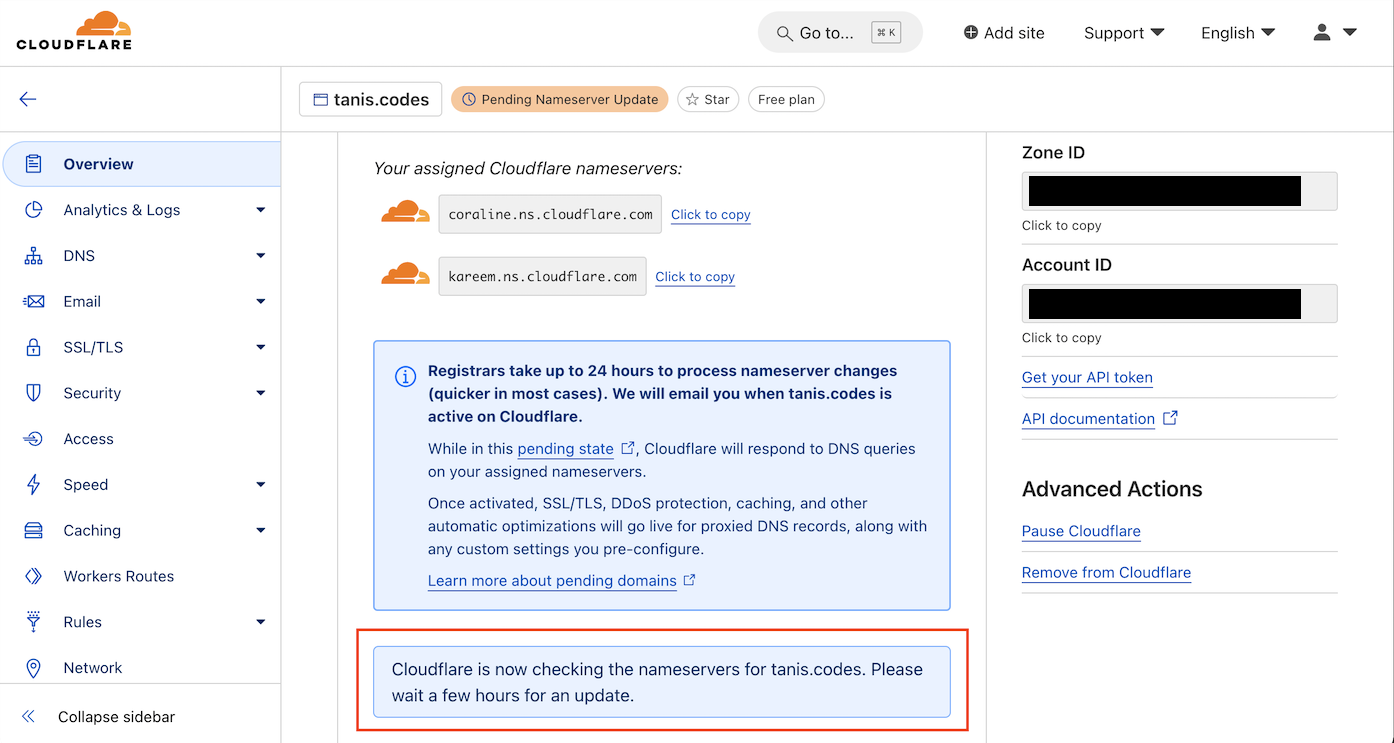
According to Cloudflare, it may take a few hours for the update to complete. However, based on my experience, it usually takes around 15 minutes.
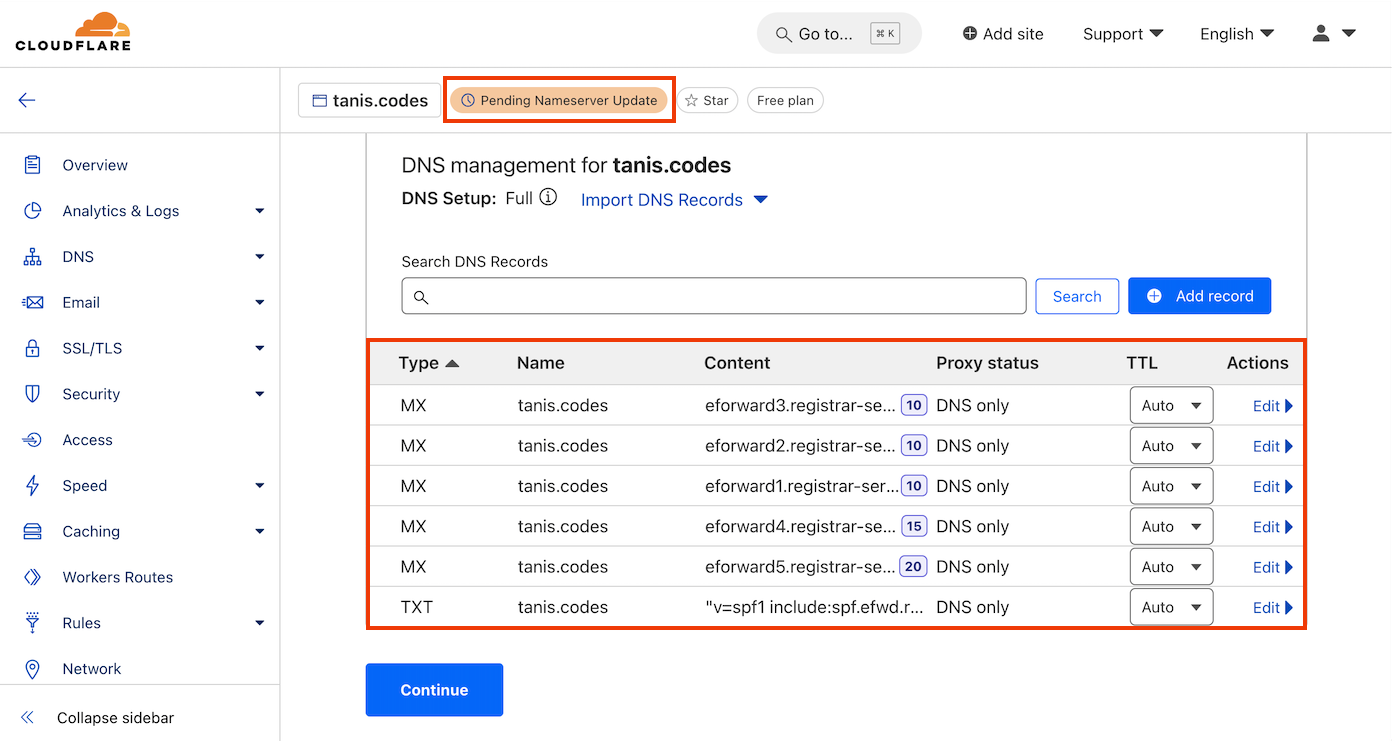
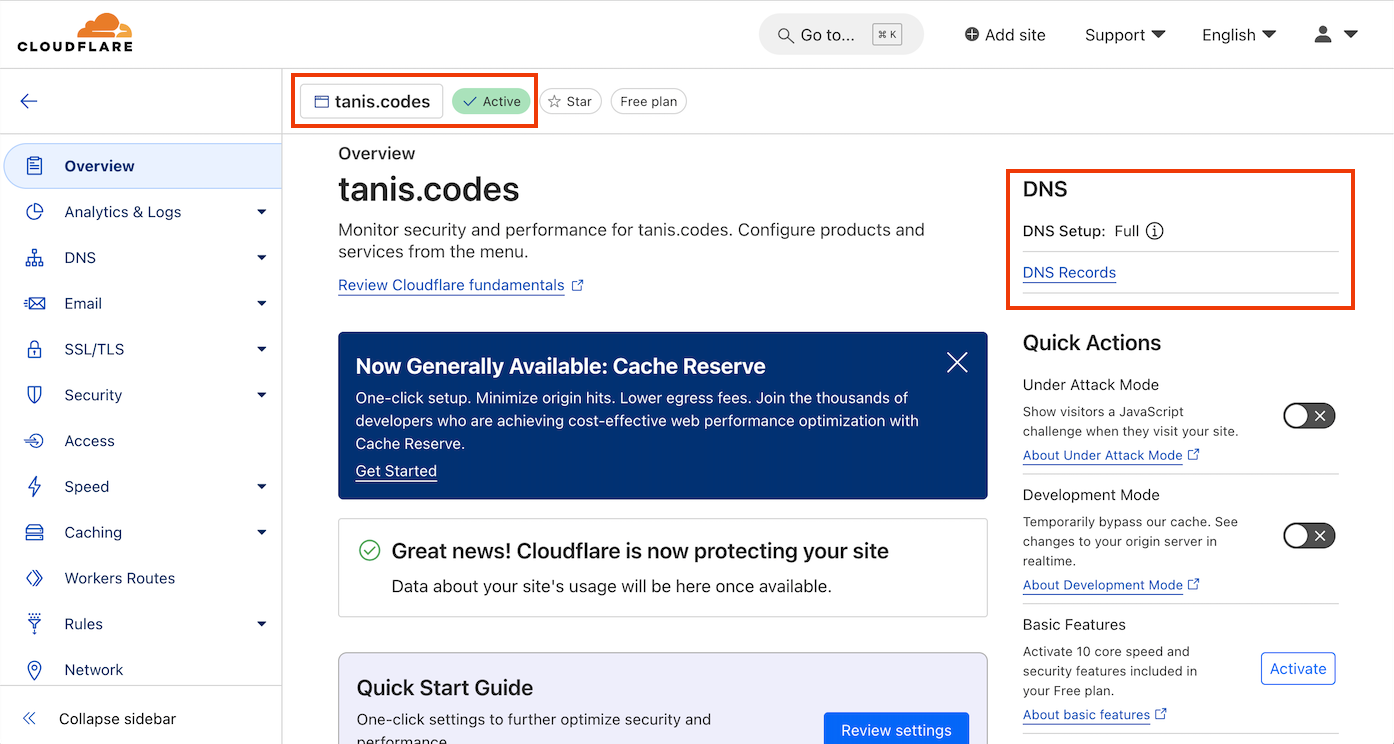
While waiting for the nameserver update, you can review the default DNS records, though no action is required at this point.
After a short while, your website and DNS configuration will be ready.
Configuring the pipeline and building the project
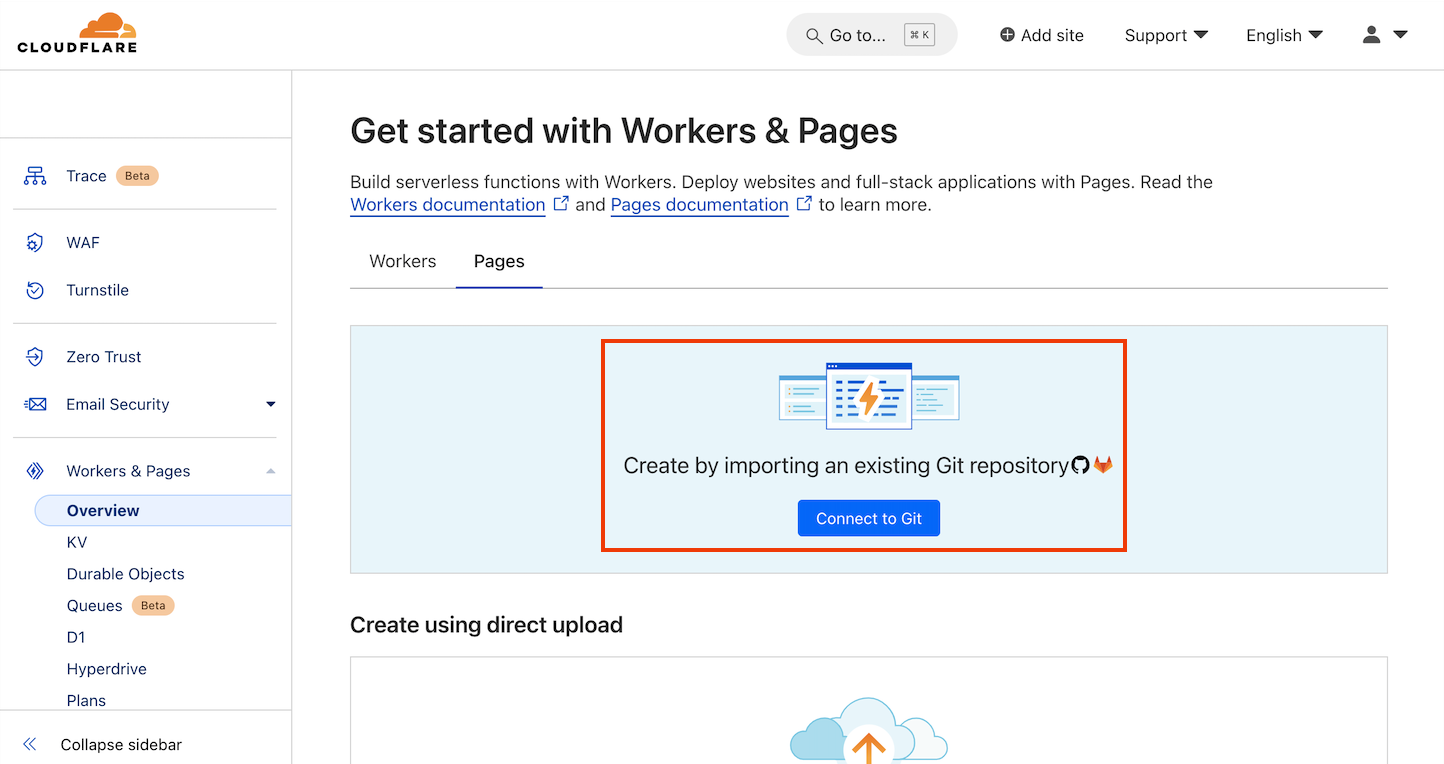
Once the DNS configuration complete, the next step is to create your static Cloudflare Page. In the Workers & Pages section, click the Manager workers button.
Next, click Connect to Git button to import an existing Git repository from GitHub or GitLab.
Select the account and the repository to be built and deployed on Cloudflare Pages.
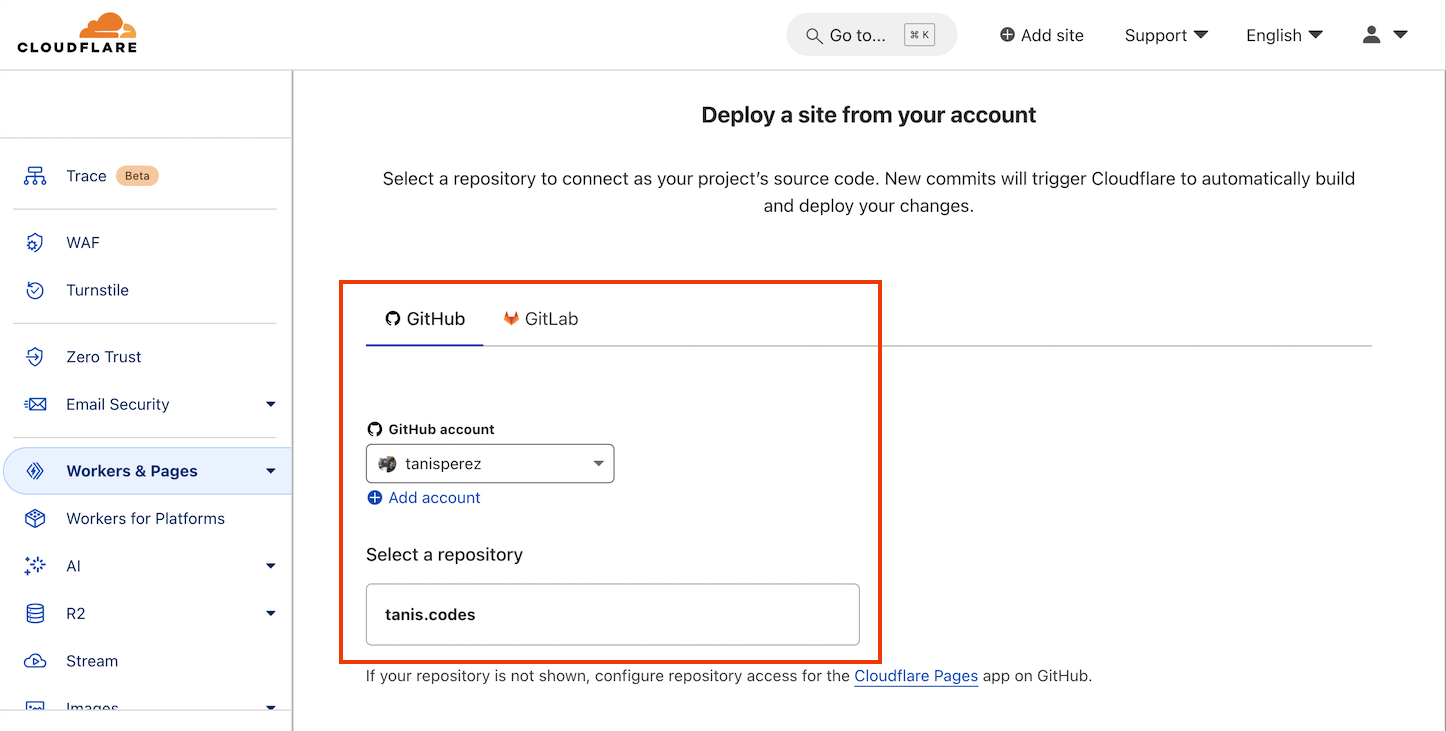
Finally, choose the Framework preset and enter the build command. In my case, this blog is made with Hugo and this is the build command for production.
hugo --minify --config config-pro.toml
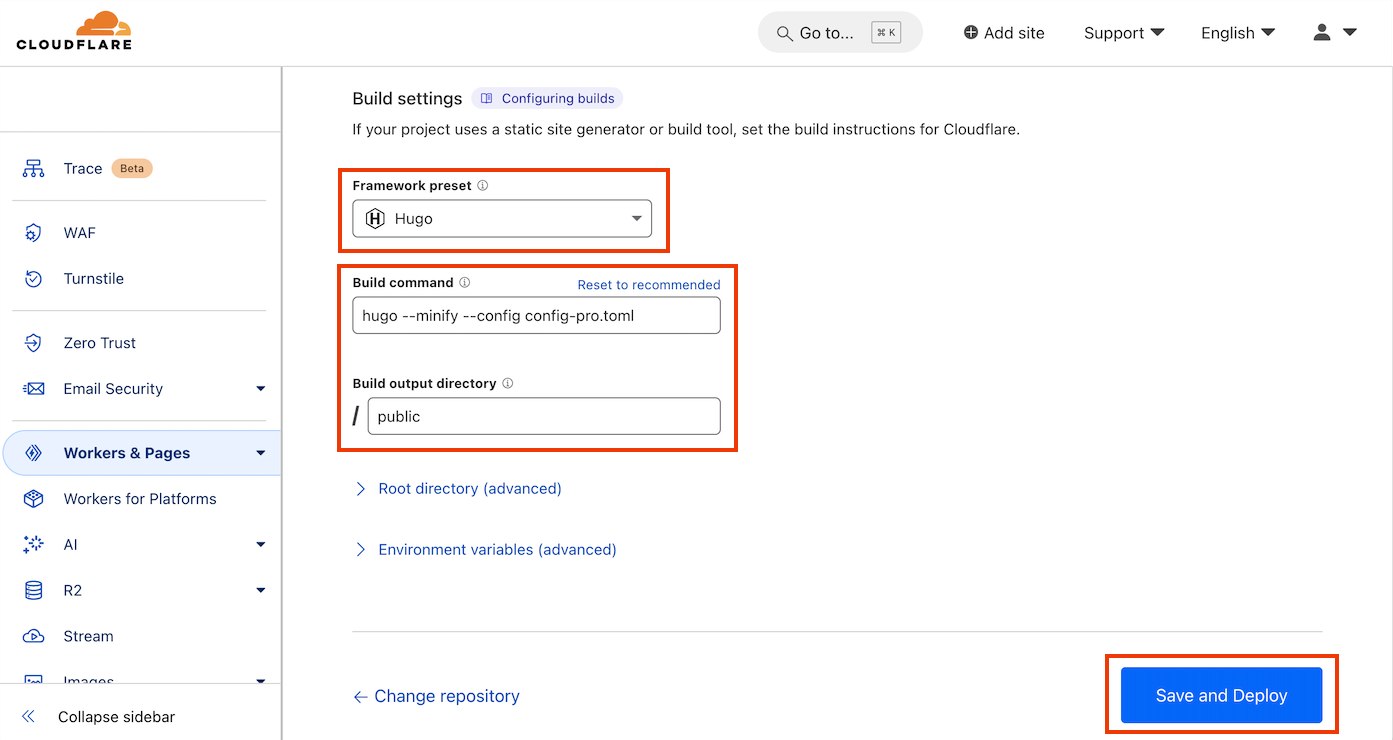
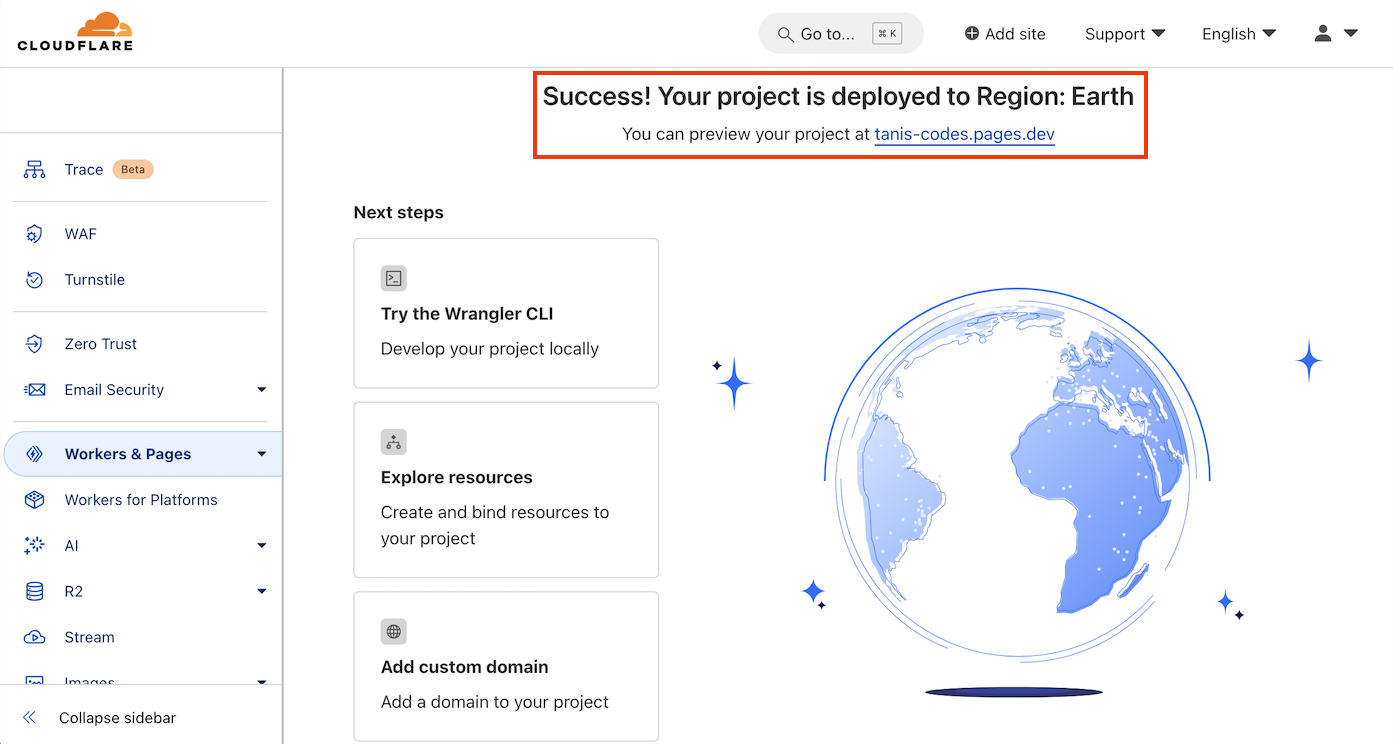
Once completed, your website will be deployed globally!
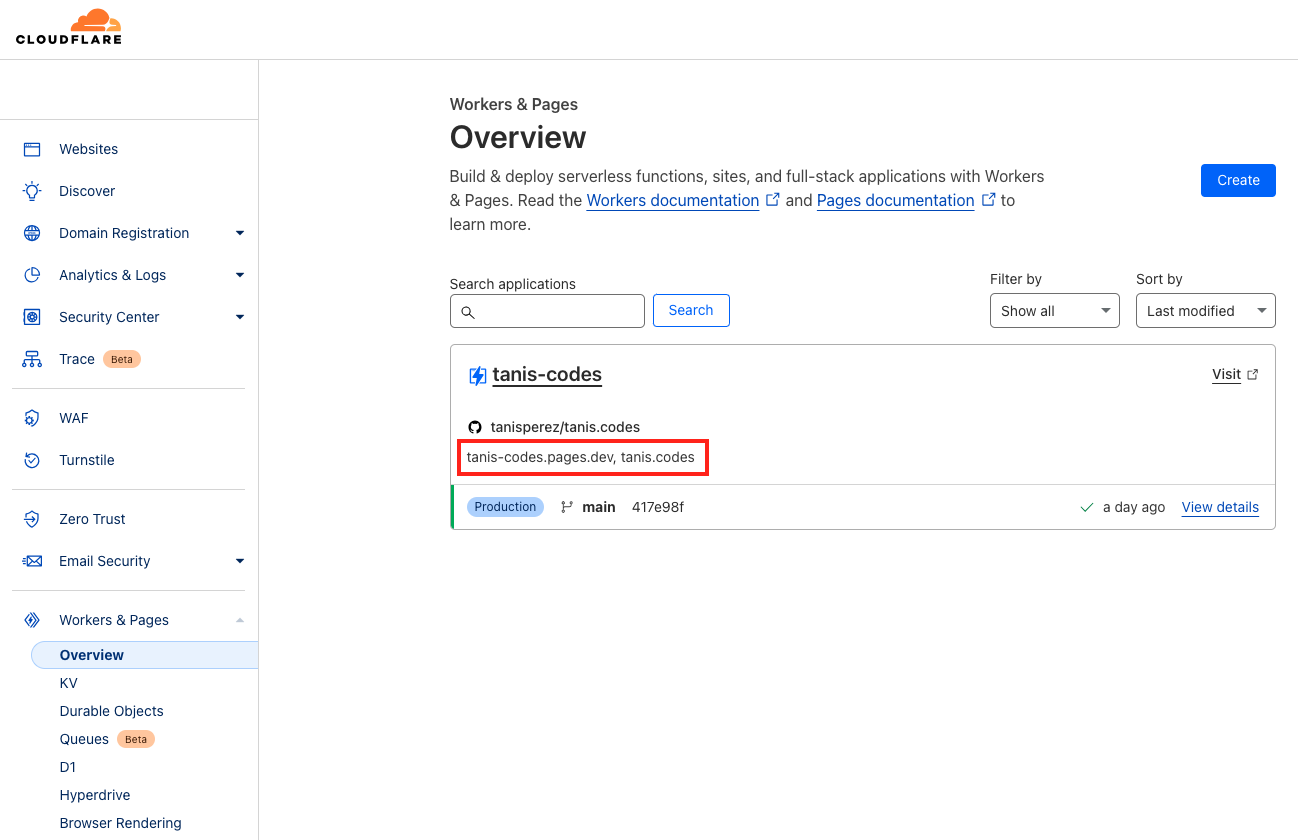
At this point, Cloudflare will provide a Cloudflare Pages URL to access your project. In my case, the URL will be tanis-codes.pages.dev.
Each commit will trigger an automatic build process on Cloudflare.
Configure a custom domain for your website
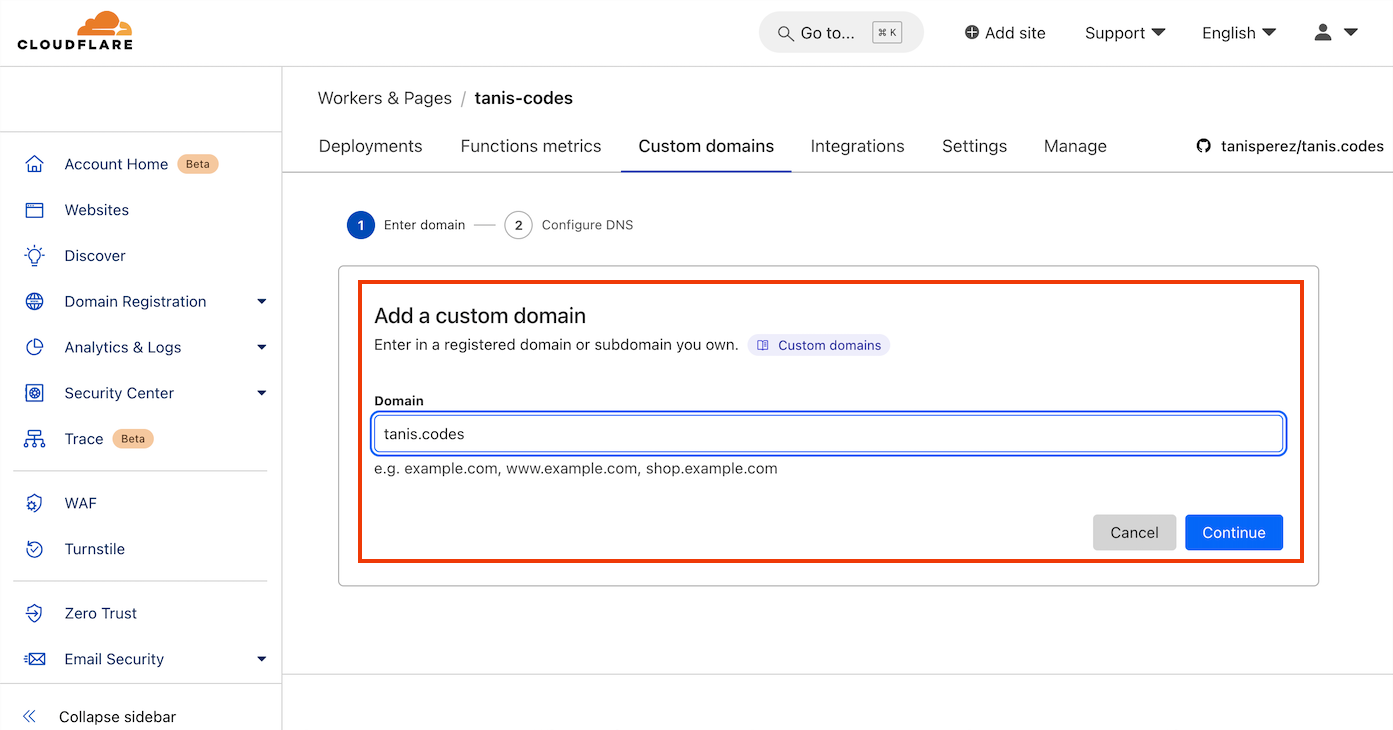
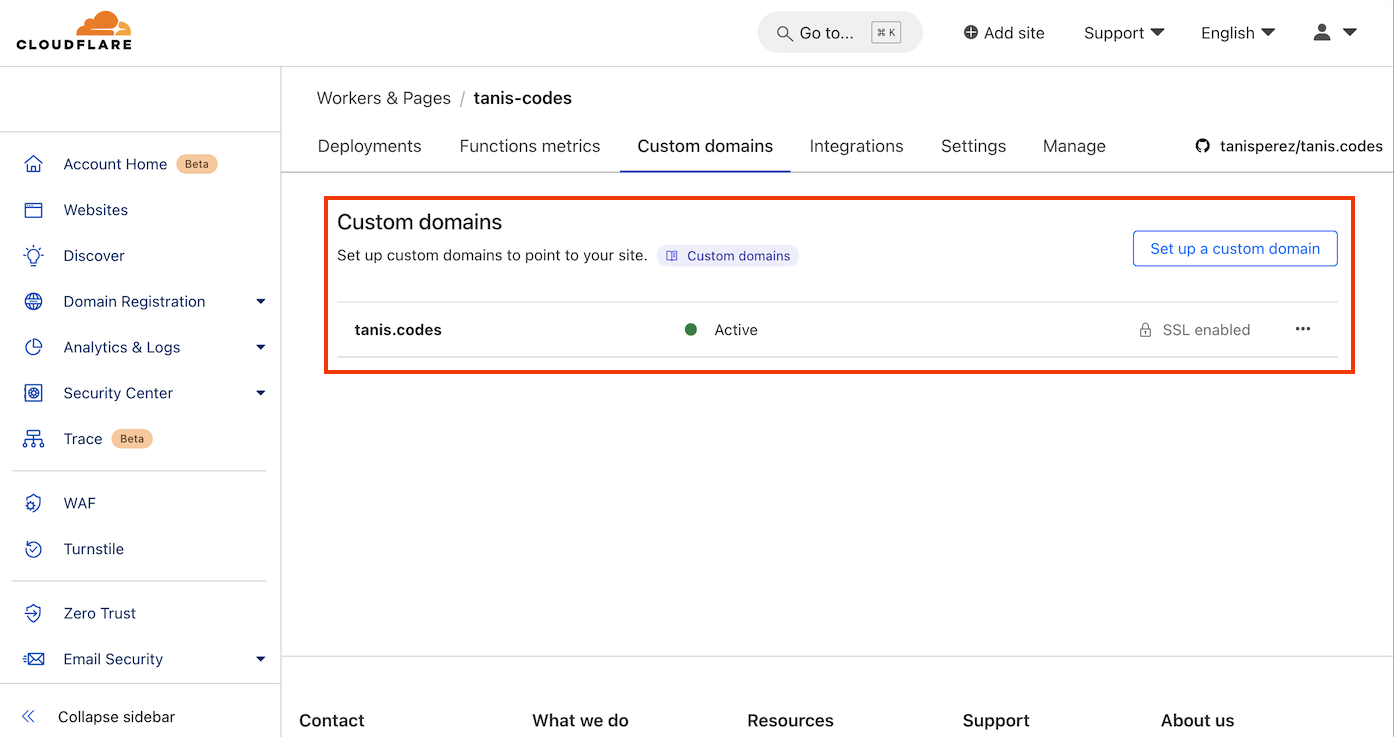
After completing the previous steps, we will configure the purchased DNS to access our website. To do this, navigate to the Workers & Pages section, select your page, and go to the Custom Domains tab.
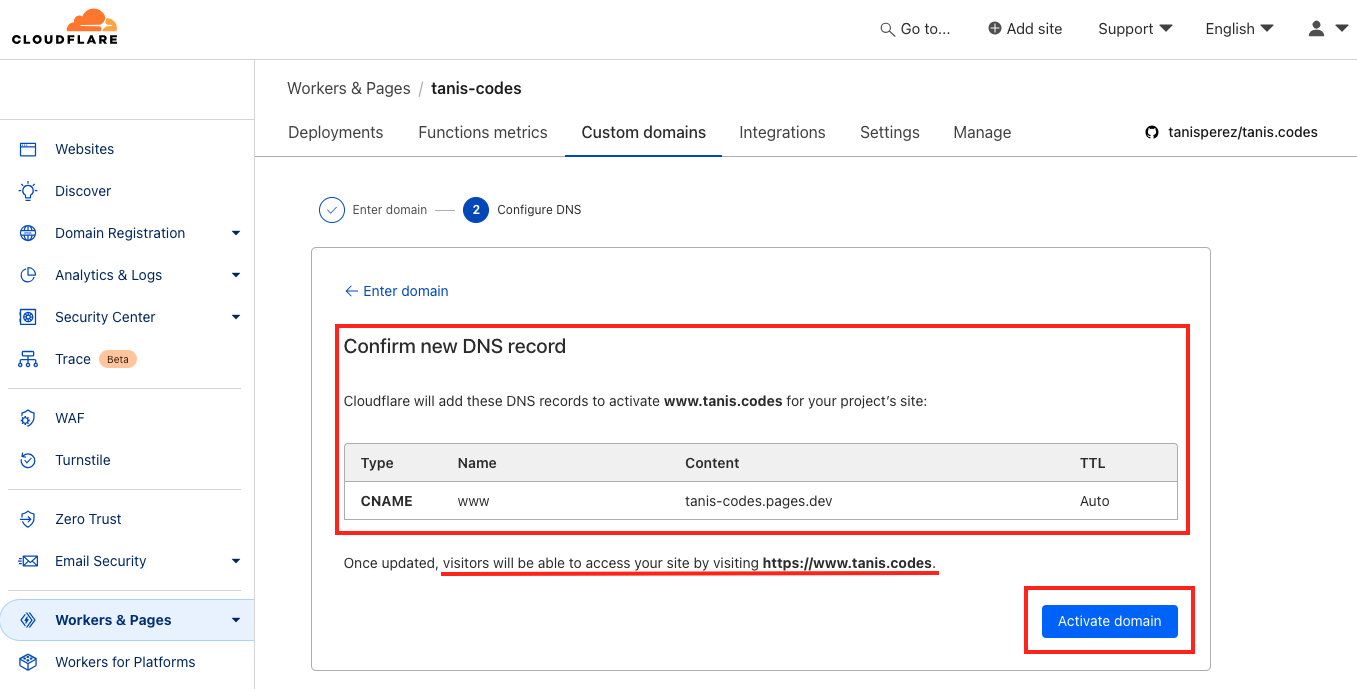
Next, we will add our custom domain. In this instance, the domain is tanis.codes. Once the domain is entered, click the Continue button to proceed.
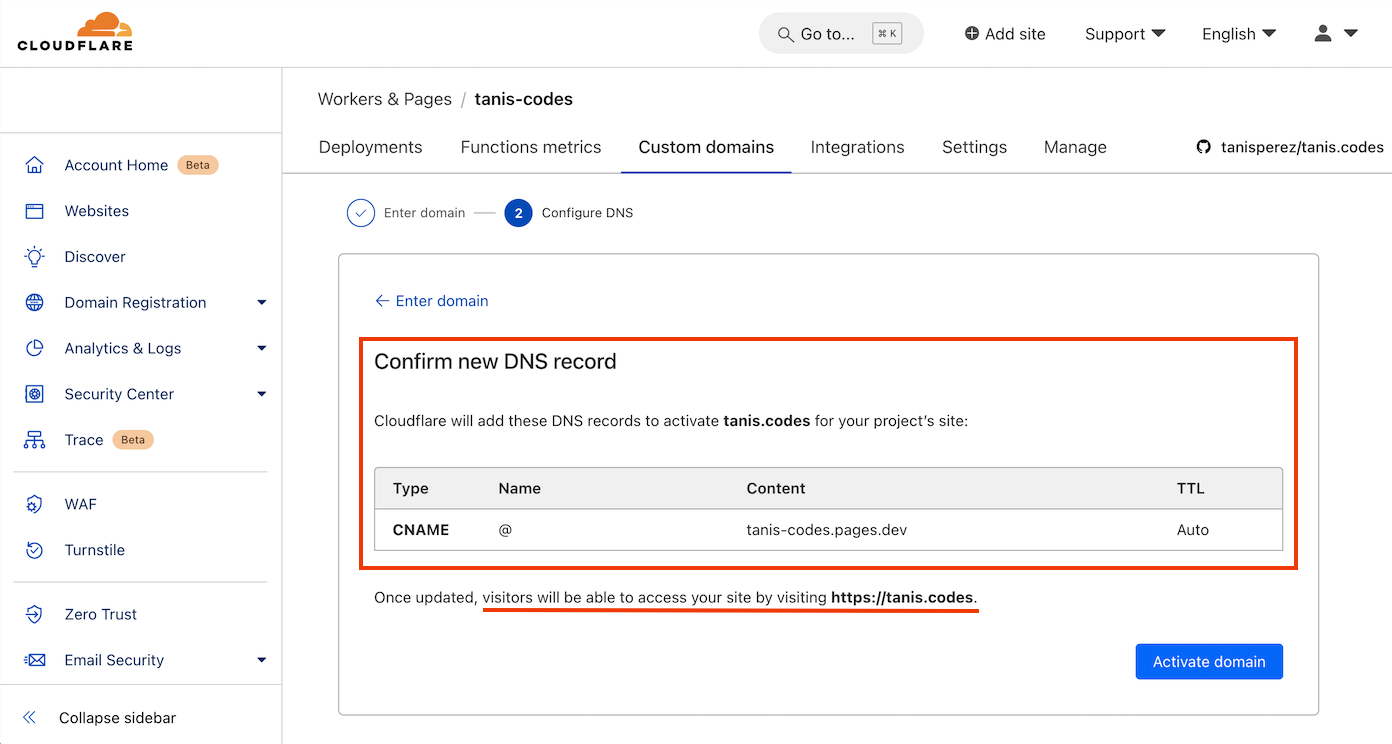
Cloudflare will add a new CNAME DNS record, ensuring that the tanis.codes domain resolves to tanis-codes.pages.dev. Next, click the Activate domain button.
Once the update is complete, visitors will be able to access the website by navigating to https://tanis.codes.
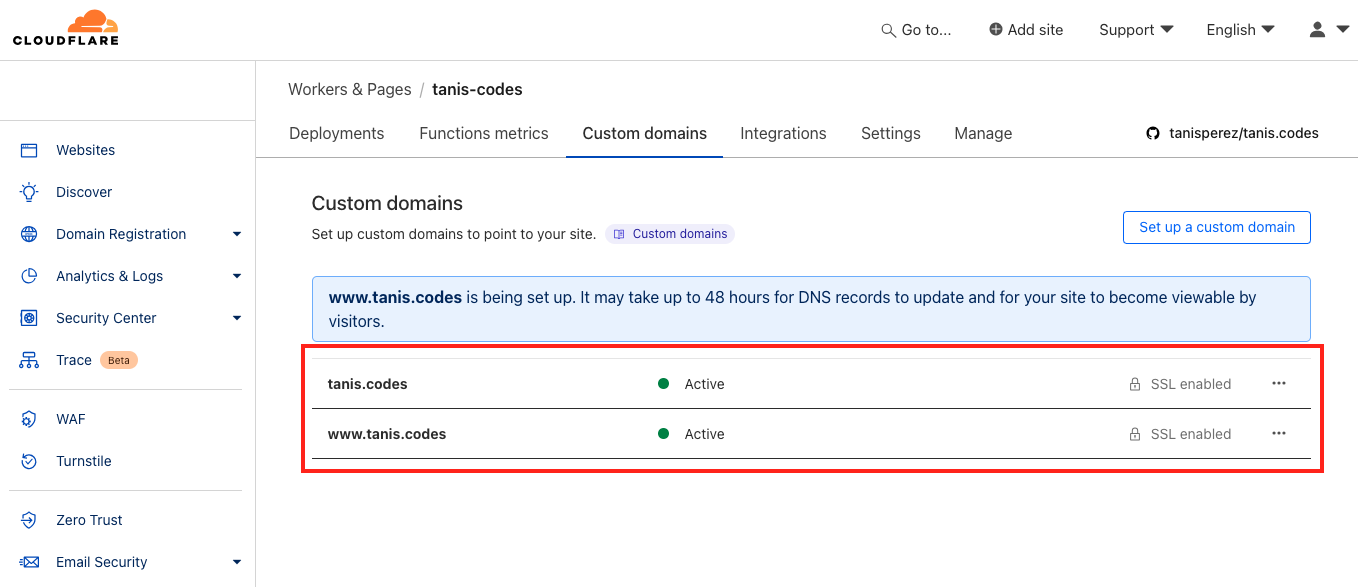
The new CNAME DNS record is being set, and this process may take some time. According to Cloudflare, it can take up to 48 hours for DNS records to fully update. However, in my experience, it typically completes within a few minutes.

Our site is now ready! To ensure you can access the website, you may need to flush your local DNS cache.
On macOS, this can be done by entering the following command in the terminal.
sudo dscacheutil -flushcache; sudo killall -HUP mDNSResponder
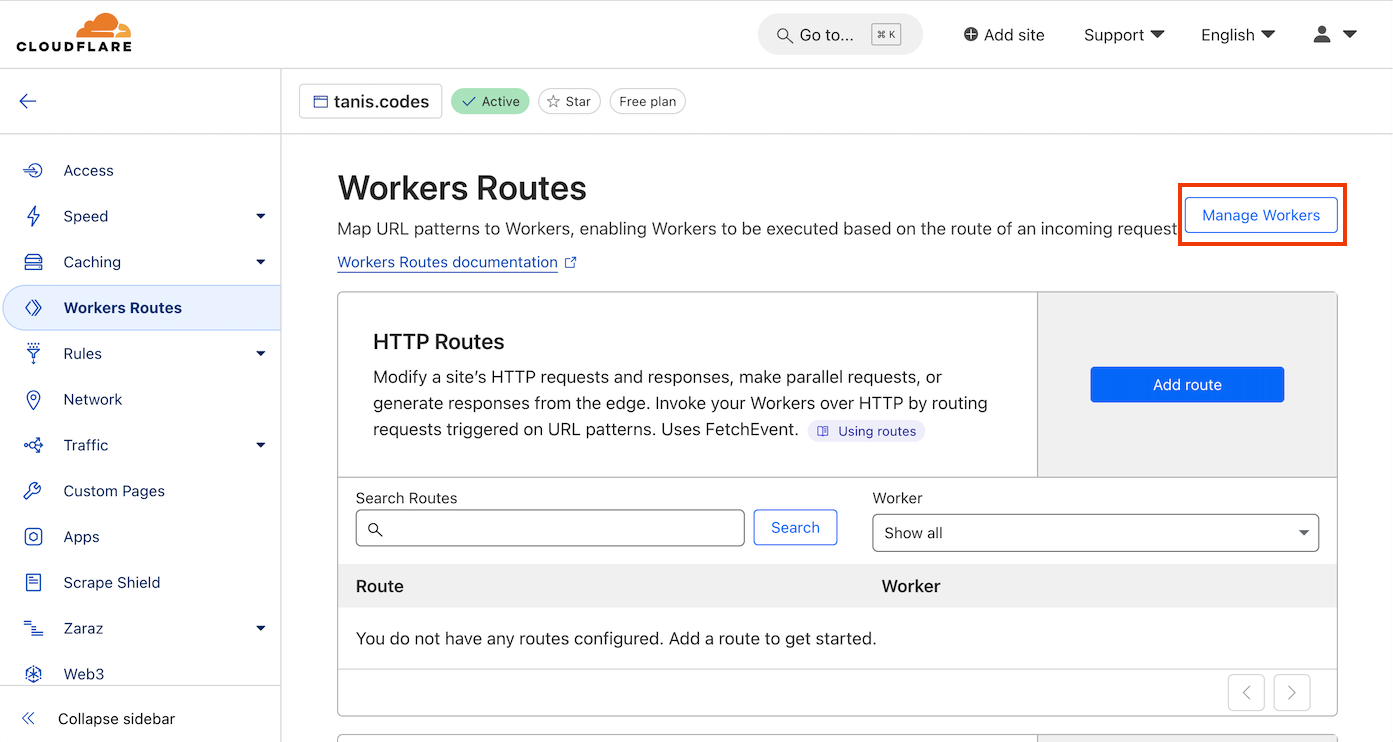
Add the www DNS record
For SEO purposes, it is beneficial to configure the website to be accessible with the www. prefix before the domain. This configuration can be made in the Workers Routes > Manage Workers section.
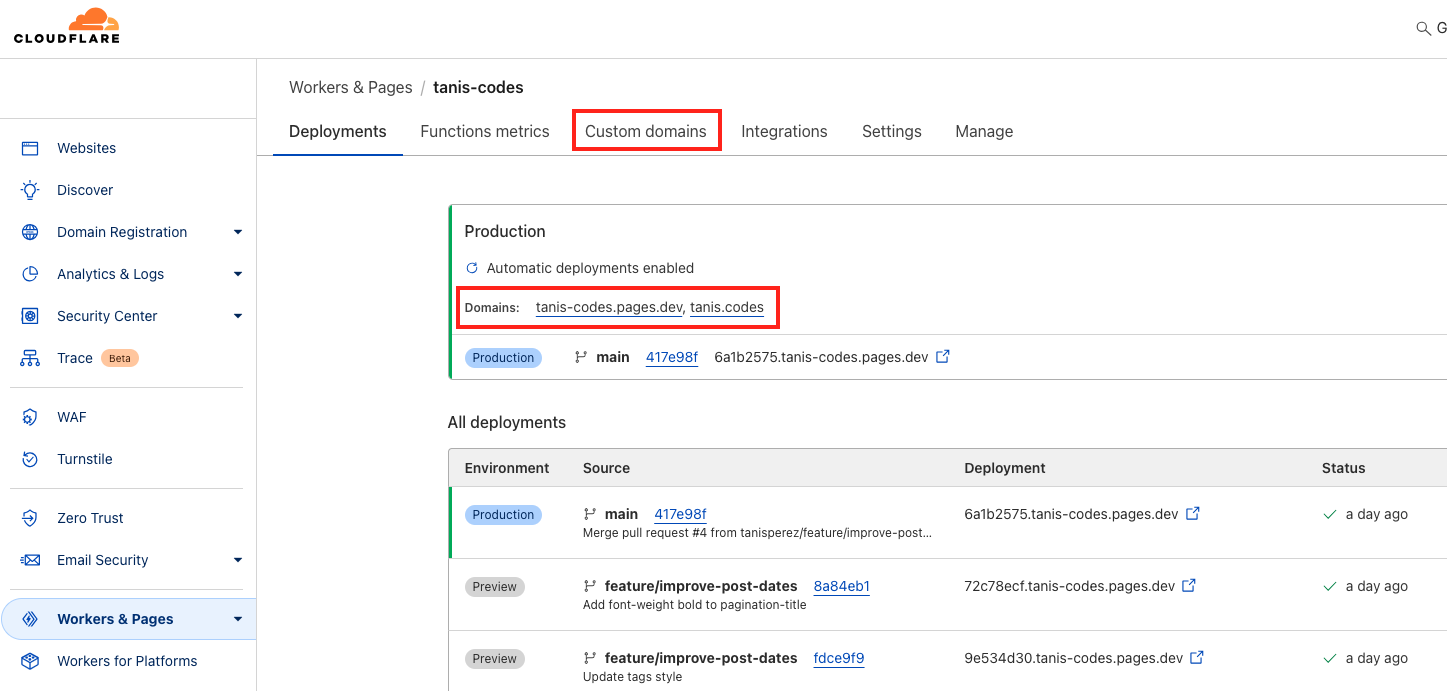
At this stage, our production site responds to the DNS records tanis-codes.pages.dev and tanis.codes. Next, click on the title of the page.
In the Deployments tab, the details of our page and the configured domains are displayed. Next, navigate to the Custom domains tab.
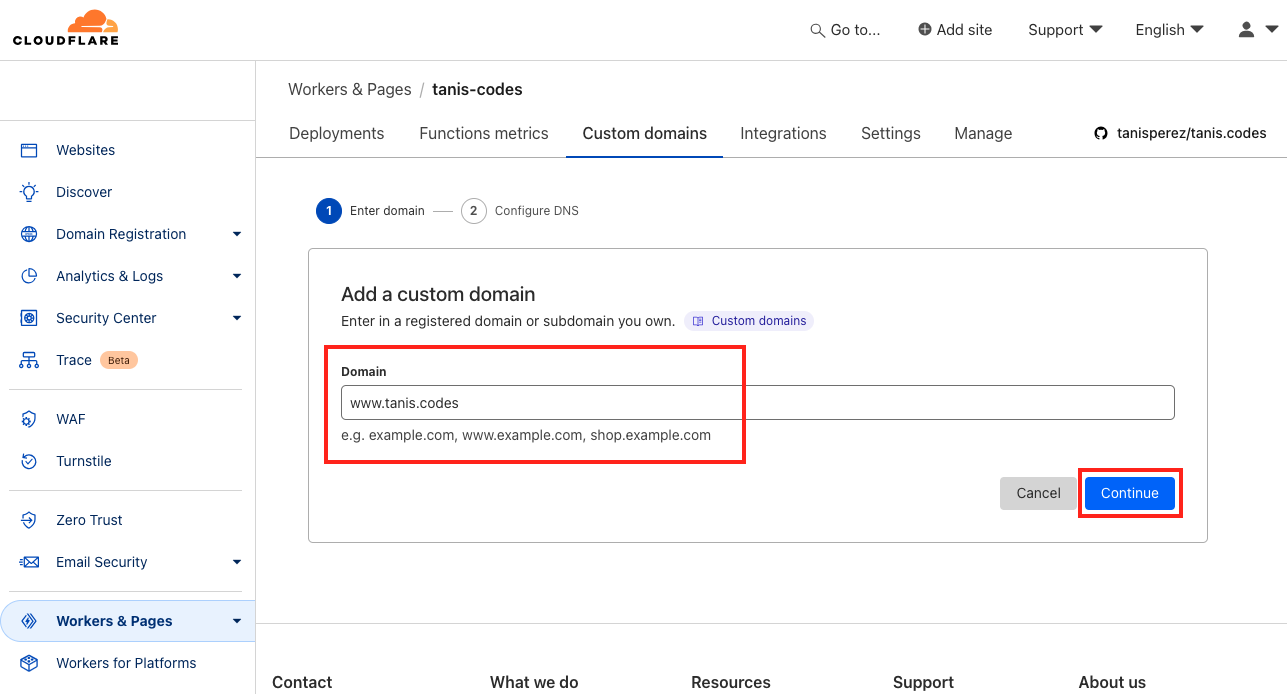
Click on the Set up a custom domain button.

Enter the domain with the www. prefix, then click on the Continue button.
You will be prompted to confirm the new DNS record to correctly redirect the page with the www. prefix.
The new custom domain will then begin initializing. This process may take a few minutes to complete.

Once completed, the page will be successfully configured and accessible with the www. prefix.
Redirect from WWW to Root using HTTP rules
In the previous step, access to the website was configured with the www. prefix. However, this configuration may present a challenge in terms of SEO. Search engines, such as Google, consider the www. subdomain to be distinct from the root domain (non-www.), which can result in discrepancies. Furthermore, within Cloudflare, these subdomains could potentially be deployed on separate servers.
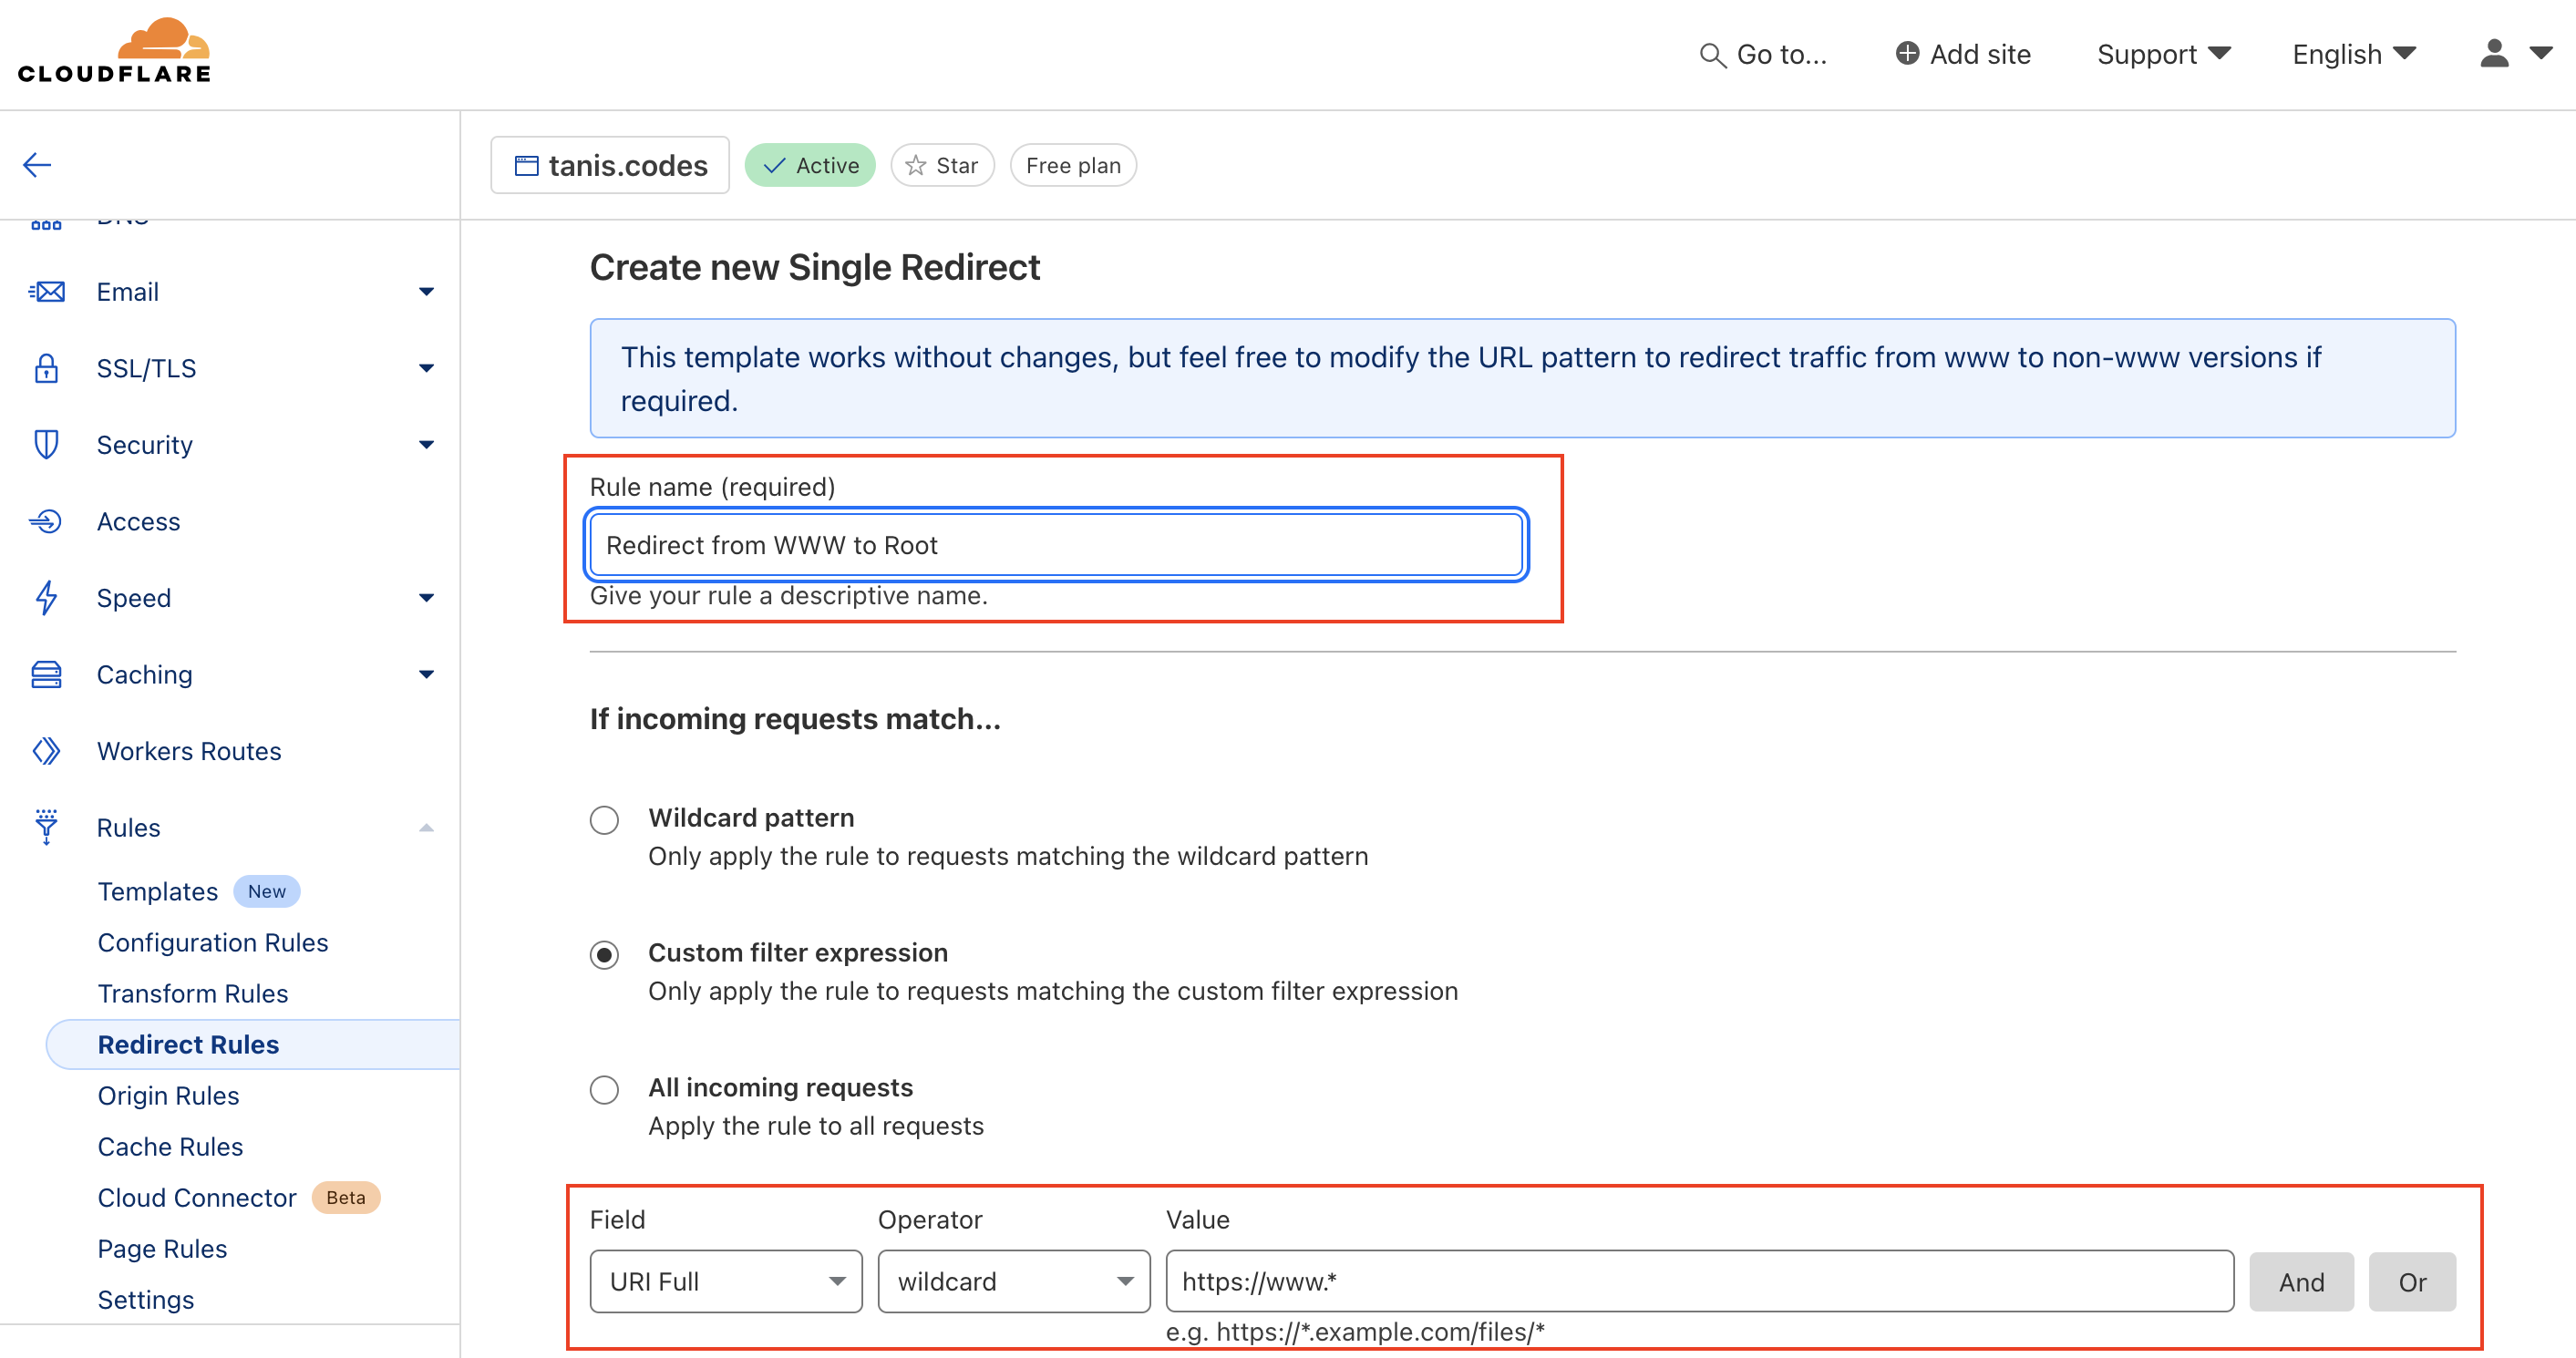
To address this issue, an HTTP rule will be created to enforce the redirection. Navigate to the Rules section and select the Redirect Rules option. Under the Redirect from WWW to Root category, click on the Create a Rule button to implement the necessary redirect.

You will be prompted to provide a name for the rule. The default custom filter expression is sufficient and will function effectively.
After completing this, if we execute the following command:
curl -v https://www.tanis.codes
The response will be HTTP/2 301.
* Request completely sent off
< HTTP/2 301
< date: Sun, 13 Oct 2024 18:59:28 GMT
< content-type: text/html
< content-length: 167
< location: https://tanis.codes/
As a result, requests to https://www.tanis.codes will be properly redirected to https://tanis.codes.
References
- Cloudflare Pages limits: https://developers.cloudflare.com/pages/platform/limits/
- Namecheap guide: https://www.namecheap.com/support/knowledgebase/article.aspx/9607/2210/how-to-set-up-dns-records-for-your-domain-in-a-cloudflare-account/
- Cloudflare nameservers: https://developers.cloudflare.com/dns/nameservers